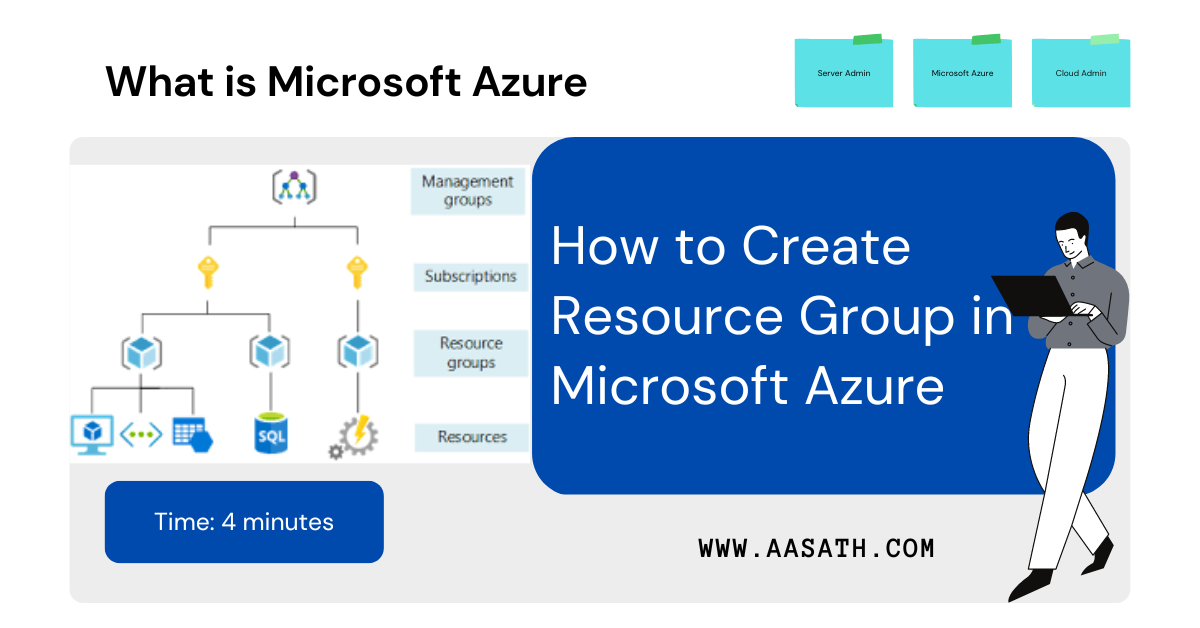
The first thing you should know in Azure is a subscription. If you are using student account, you are eligible for free usage of $100 Azure credit every year under student subscription during your academic studies. but if you are not student you can also avail $200 Azure credit for 1 year and free service available in Microsoft Azure.
Don’t just create virtual machine compute straight away to explore Azure
Once you opened a account and enrolled to subscription, first thing we have to create Resource Group.
What is difference between resource and resource group in Azure?
Resource groups: A resource group is a logical container into which Azure resources like web apps, databases, and storage accounts are deployed and managed.
Resources: Resources are instances of services that you create, like virtual machines, storage, or SQL databases.
Lets go, How to create resource group
Step 1 : Locate the Resource Group
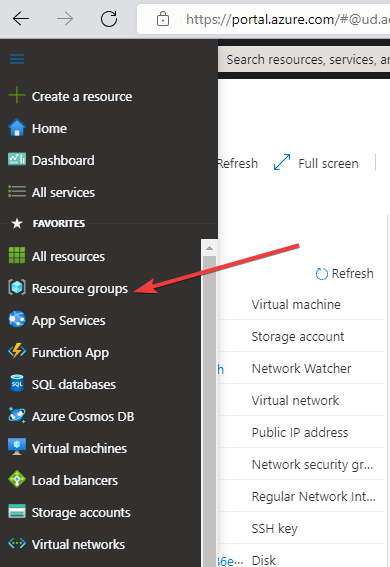
Step 2 : Choose Your Subscription and give a name.

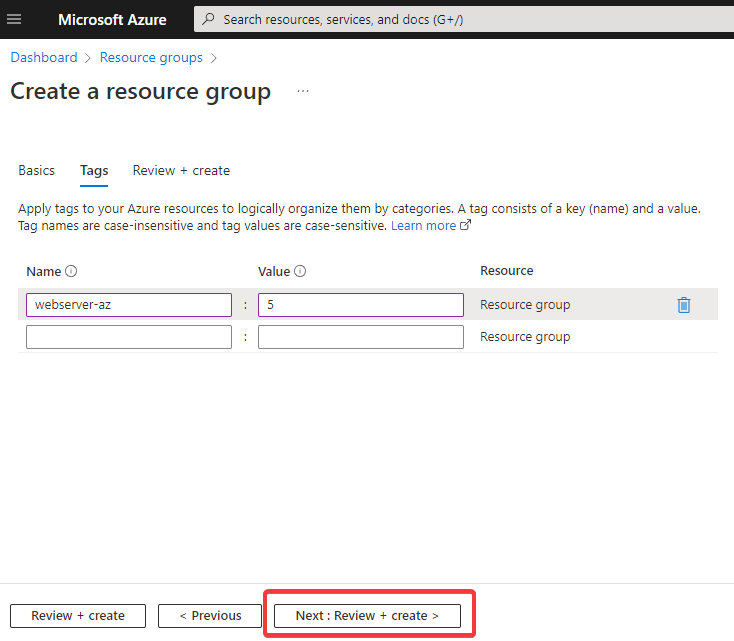
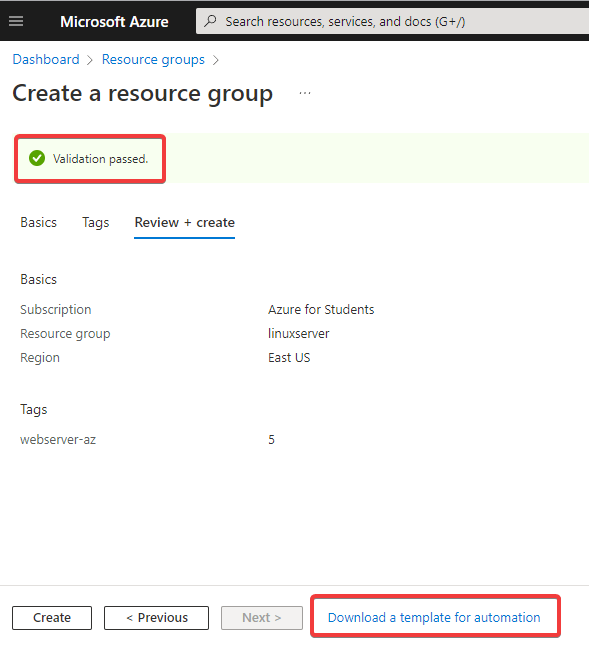
Step 3 : Give a Tag Name (Optional)
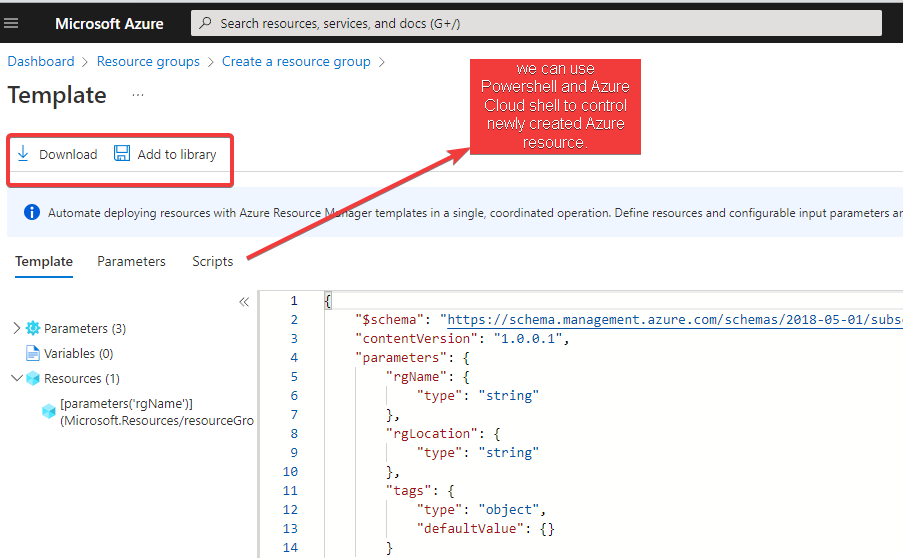
Step 4: Download this template and scripts (Future Automation)
Step 5 : Create and make sure Validation Passed
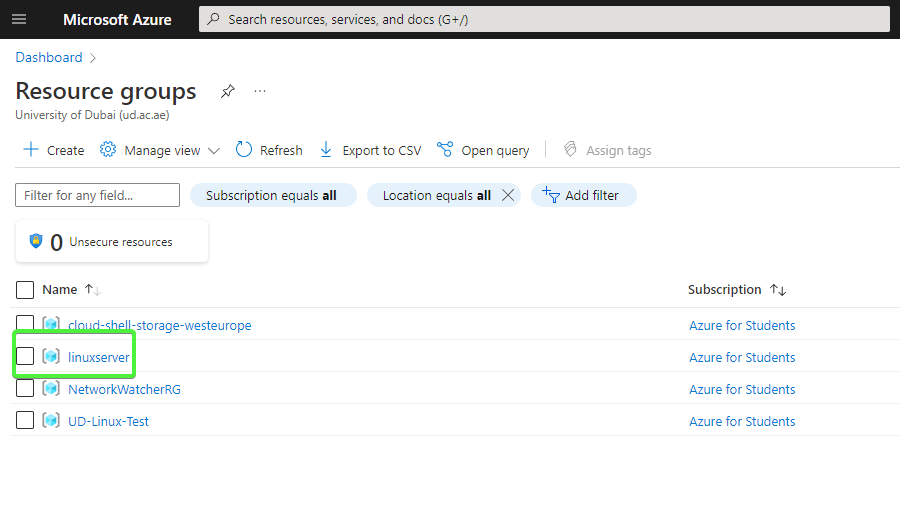
Step 6 : Verify Your Newly created Resource group
Step 7 : Bonus you can move resource group to another subscription if required.
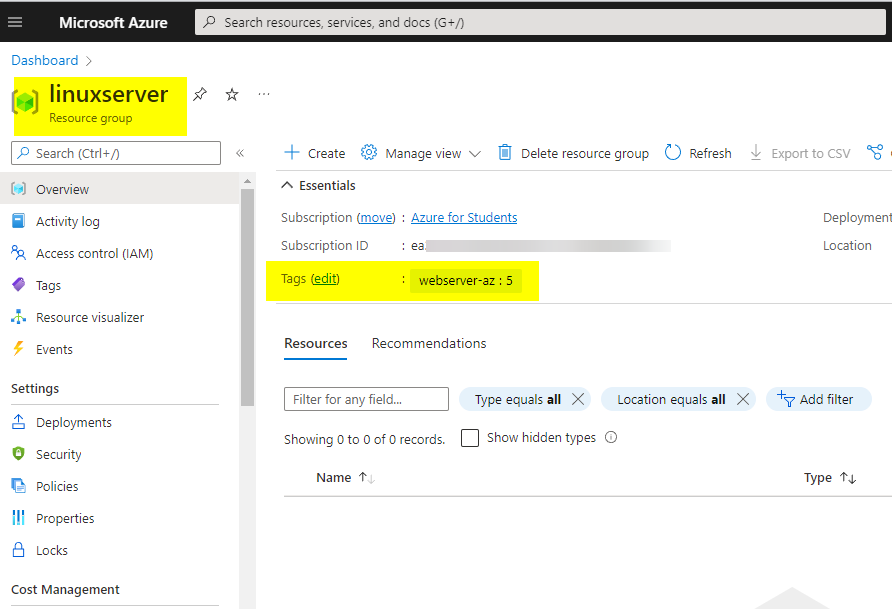
Once you have created resource group, then we can create resources like virtual machines, web apps and database in our desired resource group.
Please share to other IT studying students. Right information in right time will shape their future.
