Introduction
n8n is an open-source workflow automation tool that allows users to integrate and automate tasks across various applications, services, and databases without writing extensive code.
Key Features:
- No-Code/Low-Code Automation: Create workflows using a visual editor.
- Flexible Integration: Supports 400+ built-in integrations like Google Drive, Slack, Gmail, and more.
- Custom Scripts: Allows adding JavaScript code for advanced customization.
- Self-Hosted or Cloud-Based: Can be deployed locally or on the cloud.
- Scalable Automation: Suitable for both simple tasks and complex workflows.
n8n is ideal for IT Professionals, and businesses looking to streamline workflows, reduce manual work, and boost productivity.
n8n can be installed in Linux and Windows operating systems.
Linux (Preferred)
- Distributions:
- Ubuntu 22.04 LTS (recommended for stability and support).
- Why Linux?
- Better performance for AI/ML workloads.
- Easier dependency management with tools like
aptoryum. - Native support for NVIDIA CUDA drivers and Python environments.
Windows 11 (Alternative)
- Use WSL 2 (Windows Subsystem for Linux) for Linux-based workflows.
- Install GPU passthrough for better compatibility with NVIDIA GPUs.
- Suitable if you need Windows for other applications.
Step 1: n8n Setup for Ubuntu 22.04
Once you install ubuntu server, prepare the necessary dependences
sudo apt update && sudo apt upgrade
# To update the upgrade after fresh installation of ubuntu.

sudo apt install build-essential python3 python3-pip python3-venv
# To install python and environments

sudo apt install nvidia-cuda-toolkit nvidia-cudnn
#To install native support for NVIDIA CUDA drivers to use GPU

Step 2: Install Node.js (Recommended: Node.js 20 LTS)
Install Node.js Version Manager (nvm):
curl -o- https://raw.githubusercontent.com/nvm-sh/nvm/v0.39.3/install.sh | bash
source ~/.bashrc
Install Node.js 20 (LTS):
nvm install 20
nvm use 20
nvm alias default 20

node -v
#To Verify Node.js version

Step 3: Install n8n
Now we are already installed Node.js on this ubuntu server, now we can start installing n8n
npm install -g n8n

n8n --version
#To verify the latest version

Type n8n start or n8n – To start the application
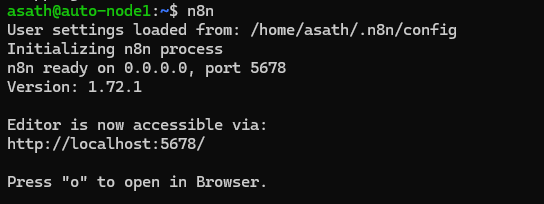
If you see this you are successfully installed n8n in Ubuntu Server, you can access this via local IP in same network.
Additional Tips
If you see any warning like below, it is probably a permission warning but still n8n works, you can fix this too.

Step 4: Check File Permissions
ls -l /usr/local/bin/n8n
# To Verify n8n binary permissions

sudo chown yourusername:yourusername /usr/local/bin/n8n
sudo chmod +x /usr/local/bin/n8n
#To Update permissions if necessary

ls -ld /home/yourusername/.n8n
#To check the home directory for n8n

sudo chown -R yourusername:yourusername /home/yourusername/.n8n
# If permissions are wrong
For Windows Users
Step 1: n8n Setup for Windows
Supported Windows Versions for n8n Installation:
- Windows 10 (64-bit) – Fully supported.
- Windows 11 (64-bit) – Fully supported.
- Windows Server 2019 and 2022 (64-bit) – Suitable for production environments.
Download and install Node.js for windows

I recommend using LTS version of Node.js for stability.
Step 2: Download and install Python for windows
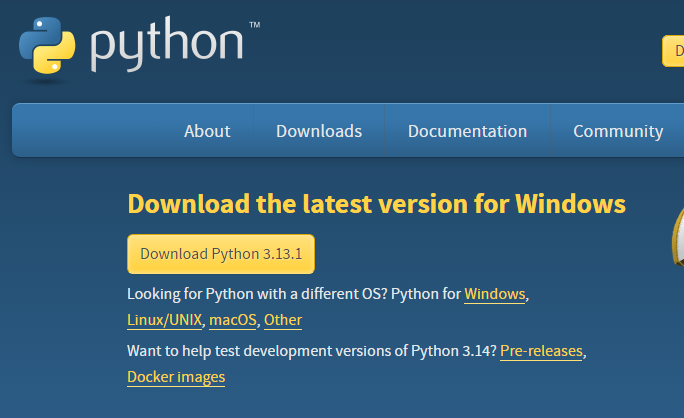
Locate the downloaded installer file and double-click it.
Important: Check the box that says:
“Add Python to PATH” (located at the bottom of the installer window).
- This step ensures Python can be accessed from the command prompt.
Step 3. Open Command Prompt to install n8n
Run the following command in Command Prompt or PowerShell
npm install -g n8n
#To Install n8n

n8n -v
#To Verify if n8n is installed properly.

n8n
#To Start n8n
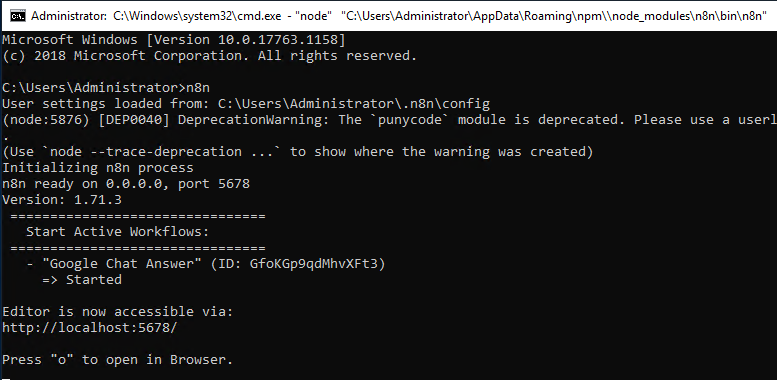
Final Output
