Moving Virtual Server (VM) from One Physical ESXi host to another physical ESXi host server in VMware Hypervisor environment, you can migrate to same, different cross cluster even cloud or remote site.
vMotion is a feature of VMware vSphere that allows you to live-migrate virtual machines (VMs) from one host to another without any downtime. This means that you can move a VM from one host to another without having to shut it down or restart it.
STEP 1: Requirement
Here we have already set up the cluster with three ESXi host name ASATH-POC-Cluster along with vcsa01-poc as a vCenter Server 8.
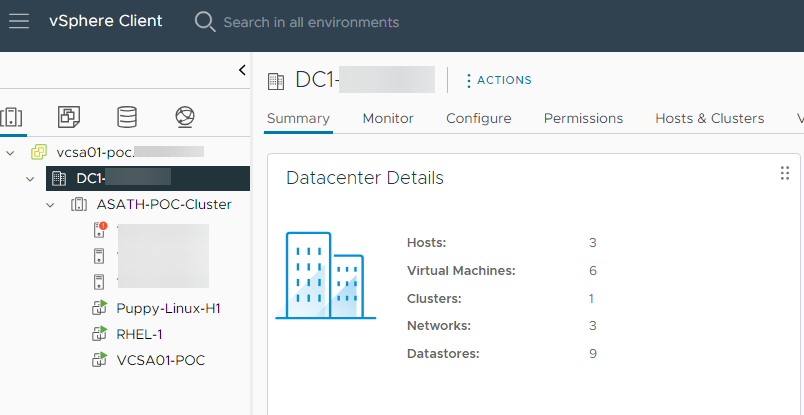
STEP 2: Create a vMotion network.
By Default, there will not vMotion network in ESXi host. We need to create manually this network is used to communicate between the hosts during a vMotion migration. Here are the detailed steps on how to configure vMotion on each host:
- Ensure Network Connectivity: Make sure that the ESXi hosts you want to use for vMotion are connected to the same network and have IP connectivity with each other. vMotion requires a dedicated network for transferring VM data between hosts.
- Create a vSphere Standard Switch (vSwitch):
- Log in to your vCenter Server using the vSphere Client.
- Select the appropriate datacenter or cluster from the inventory.
- Navigate to the “Hosts and Clusters” view.
- Select the ESXi host where you want to create the vMotion network.
- Right-click the host and choose “New vSphere Standard Switch.”
- Give the switch a name, and you can choose whether to use the default settings or configure custom settings.
- Add VMkernel Network Adapter:
- In the vSphere Client, navigate to the “Configure” tab of the selected ESXi host.
- Under “Networking,” click “Virtual switches.”
- Select the vSwitch you created earlier.
- Click the “Add Host Networking” icon (looks like a plus “+” sign).
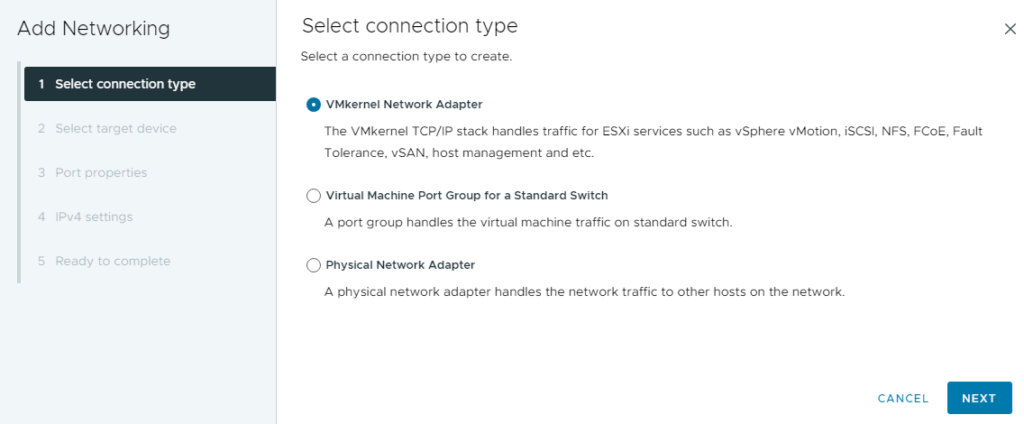
- Choose “VMkernel Network Adapter” and click “Next.”
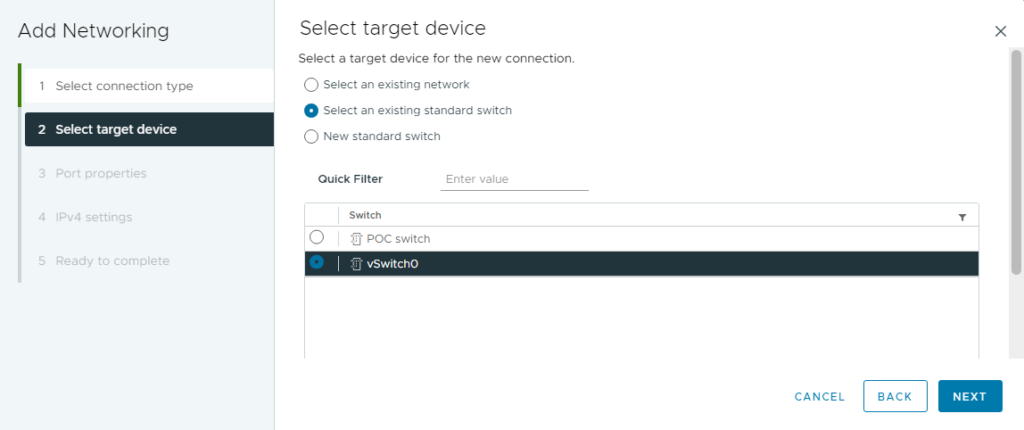
- Select the “Create a new virtual switch” option and choose the previously created vSwitch.
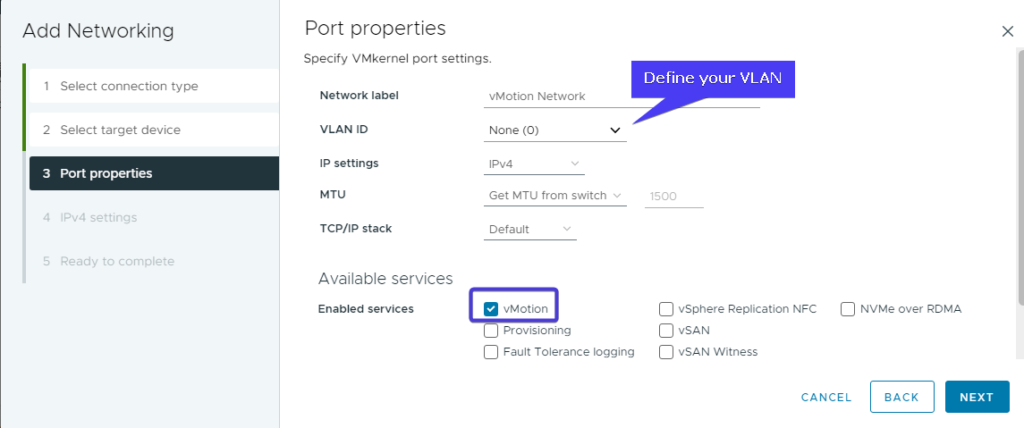
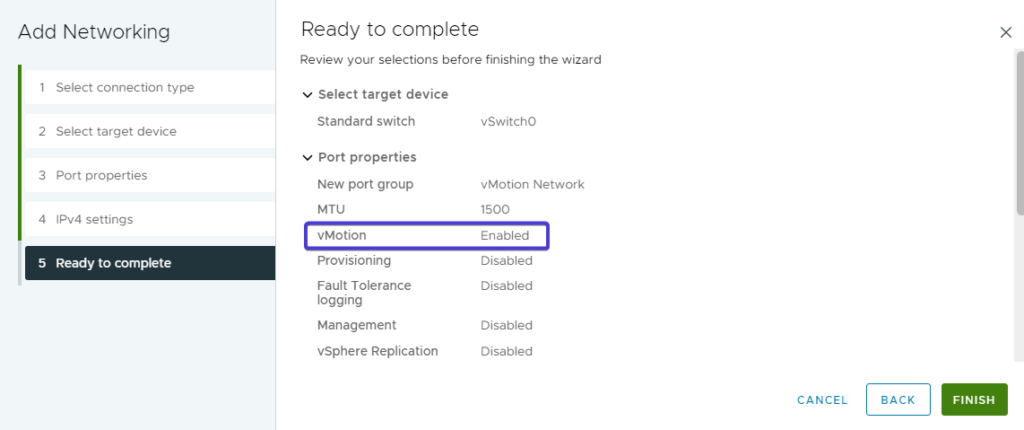
- Assign a label (e.g., “vMotion”) and an IP address for the vMotion VMkernel adapter. Ensure that this IP address is reachable from other ESXi hosts in the vMotion network.
- Complete the wizard and create the VMkernel adapter.

Click ADD NETWORKING to create new vMotion Network in ESXi Host
- Verify vMotion on the VMkernel Adapter:
- Go to the “Networking” section on the ESXi host configuration page.
- Click on the “TCP/IP” settings of the newly created vMotion VMkernel adapter.
- Verify”vMotion” traffic by ticking the checkbox next to “vMotion.”
- Repeat for Other ESXi Hosts:
- If you have multiple ESXi hosts and want to enable vMotion for all of them, repeat the above steps on each host.
- Ensure all hosts have a VMkernel adapter with the “vMotion” checkbox enabled and are on the same vMotion network.
- Make sure to allocation different IP for vMotion service for each host e.g 10.10.0.5, 10.10.0.6 and 10.10.0.7
- Verify vMotion Migration:
- To test vMotion functionality, select a virtual machine running on one of the ESXi hosts.
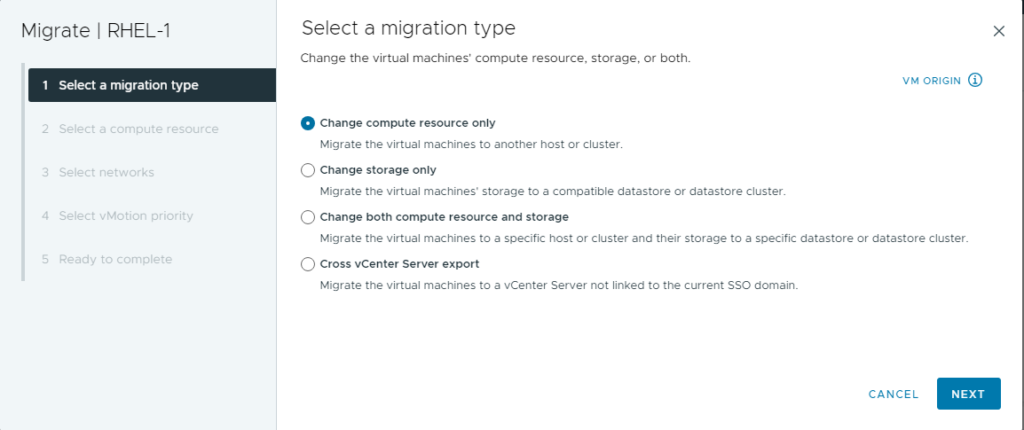
- Right-click the VM and choose “Migrate” > “Choose your Options.”
- Select the destination host and click “Next.”
- Select the appropriate vMotion network as the migration network and continue with the migration wizard.
- The VM should now be migrated from one host to another over the vMotion network.
Creating a vMotion network allows you to perform live migrations of virtual machines between ESXi hosts with minimal downtime. It is an essential feature for maintaining virtual machine availability and balancing resource utilization across the hosts in your vSphere environment.
